Wednesday, August 11, 2010

Chocolate Chip Cookies!

My son was in a baking mood and wanted to learn how to bake chocolate chip cookies. "What the heck." I said. I mean it's only 100 degrees outside. Why not heat up the inside of the house with a 375 degree oven? We didn't have any chocolate chips at the house, so we had to brave the scorching heat and Wal-Mart in order to get the chocolate chips. Why did I agree to this baking lesson again?


Chocolate Chip Cookies 001

Here we go. First you dump your flour in a mixing bowl.

Chocolate Chip Cookies 002

Then you add baking soda and salt. Make sure you don't misread a teaspoon of salt as a tablespoon of salt. Phew, that was a close one.

Chocolate Chip Cookies 003

Set aside the dry ingredients for a bit and grab another mixing bowl for the wet ingredients. You're going to need two sticks of softened butter. Mmmmmm, butter.

Chocolate Chip Cookies 004

Then add in granulated white sugar.

Chocolate Chip Cookies 005

Now the brown sugar. Don't forget that you have to pack brown sugar.

Chocolate Chip Cookies 006

Then add a teaspoon of vanilla.

Chocolate Chip Cookies 007

Now cream the butter, sugar, and vanilla together. You may have to dodge flying bits of butter for the first couple of seconds until it gets incorporated. Don't worry. We'll work on keeping it in the bowl. It takes practice. Don't get frustrated. The dogs will eat the flying bits of butter off the floor. They like butter and sugar just as much as humans.

Chocolate Chip Cookies 008

Now beat the eggs into the butter and sugar mixture.

Chocolate Chip Cookies 009

Add the dry ingredients to the wet ingredients. Not all at once. Just a little at a time. It's easier to stir that way.

Chocolate Chip Cookies 011

Then add the entire package of chocolate chips. Yes, the entire package. I braved Wal-mart for those semi-sweet morsels, now dump 'em ALL in that bowl.

Stir.

Chocolate Chip Cookies 010

And stir. Use those muscles.

Chocolate Chip Cookies 012

Place spoonfuls of dough on a cookie sheet and bake for about 10 minutes at 375 degrees.

Chocolate Chip Cookies 013

Now drool and eat while they are still warm and gooey.

Great job, kid! Now clean up your mess while your mother goes and lays on her bed under the ceiling fan.

Saturday, July 17, 2010

Strawberry Parfaits

It's too hot to really cook, but my son found this simple recipe for a Strawberry Parfait, and with some minor adjustments we made it even more simple. In the words of Donkey from Shrek, everybody loves a parfait.

Cooking Lesson; Strawberry Parfait 001

First you have to wash your strawberries. You don't have to wear rubber band bracelets when you do this, but if you want to look cool, you probably should.

Cooking Lesson; Strawberry Parfait 002

Then slice your berries.

Cooking Lesson; Strawberry Parfait 003

Next you are going to want to sweeten the strawberries with a bit of sugar.
Can I just say how delicious these particular strawberries were? I had quit buying strawberries, because they had been tasting a lot like, um, well, a lot like nothing. However, these strawberries were sweet, juicy, and delicious. Summer in a bowl.

Cooking Lesson; Strawberry Parfait 004

The original recipe calls for you to cook up some pudding. It's too hot to use the stove and we were too lazy anyway. We bought already made vanilla pudding and emptied the containers into a bowl. We then quickly disposed of the containers, stood back and proclaimed, "Look! Pudding!"

Cooking Lesson; Strawberry Parfait 005

Stir some Cool Whip into your pudding to make it light and fluffy.

Cooking Lesson; Strawberry Parfait 006

Now you are going to layer the pudding/cool whip mixture and the strawberries into glasses.

Cooking Lesson; Strawberry Parfait 007

Continue layering until the glass is filled to the top. Then at the very top add a little dollop of Cool Whip.

Cooking Lesson; Strawberry Parfait 008

Voila! Sit out on your back porch and enjoy the fact that you didn't have to use the stove or oven to create this delicious treat.

Monday, June 28, 2010

Sitting on the Dock of the Bay


Summer school is whipping my butt, so this is all have for you right now. Cooking lessons will resume eventually.

Wednesday, June 16, 2010

BMX Racing

My son races BMX here in Missouri almost every week. This past week we decided to try out a new track in Oklahoma.


Here he is at the starting gate.


And they're off!


C'mon dude! Don't lose steam now! Pedal!

He came in third. He was having some problems with his pedals. He's still not completely used to the new "click-in pedals" that his dad bought him Puerto Rico, but he's getting there.


Racing sure does wear a guy out. I don't know what excuse the dog has.


And just to give fair screen time to my baby....isn't he precious!?

Saturday, June 12, 2010

Pizza. Pizza.

Okay, here's an easy one. Pizza. I want to teach my son how to cook, so that when he moves out on his own he won't starve. I realize that pizza is something you can have delivered right to your front doorstep. However, I know what it's like to be a poor college student trying to survive from one financial aid disbursement to the next. Believe me. I know. Ordering pizza can be quite expensive, so it's good to know how to make your own pizza creation. It usually tastes better than delivery, and it sure as heck tastes better than frozen. So, let's make pizza.

I usually make my own pizza crust from scratch, but my oldest sister fixed a pizza for me not too long ago utilizing Jiffy pizza crust mix and it tasted great. It also only costs $.59. Can't beat that for a poor college kid. I mean come on. That's right up there with Ramen noodles.


For this pizza we are going half and half. My son wanted BBQ chicken pizza and I wanted just a simple basil and cheese pizza. For the BBQ chicken half of the pizza, you need to cut up boneless, skinless chicken breasts into 1 inch cubes and cook them in a skillet over medium heat until no longer pink and the juices run clear. Then set aside while you make the crust.


Put the Jiffy pizza crust mix in a bowl with water and knead the resulting dough. Let the dough rise in a covered bowl in a warm place for 5 minutes.


After the dough has risen, place it on a pizza pan or cookie sheet and spread it out across the pan using your fingers. You may want to lightly spray the pan with cooking spray, although that sometimes makes it difficult to spread out the dough. Prebake the crust in a 400 degree oven for about 3 to 4 minutes.


Next spread BBQ sauce (We used Billy Sims BBQ sauce, because there is nothing better) over one half of the pizza.


Then spread tomato pizza sauce over the other half. You can use homemade sauce or sauce from a jar like we did.


Spread shredded chicken over the BBQ side and torn basil leaves over the tomato side.


Top with shredded mozzarella cheese and bake in a 400 degree oven for about ten minutes.


Let it cool for at least five minutes before you slice it.

We also made blueberry cobbler, but my camera battery died without warning while we were in the middle of the process.


I was only able to get this picture of my son buttering the bottom of the pan.


And this picture of my son melting butter in the microwave.

You will just have to use your imagination now.....................and through the miracle of the Internet, we have.....


A delicious blueberry cobbler with vanilla ice cream on the side.


It is recommended that after eating pizza, cobbler and ice cream that you go on a bike ride.

Sunday, June 06, 2010

Killing Two Birds with One Stone


This is what you call killing two birds with one stone. I took my son to the community pool where he spent a few hours surfing and swimming and I caught up on my studying. He was happy, I was....caught up.

Friday, June 04, 2010

A Taste of the Caribbean

My ex-husband and father of my son is Puerto Rican. He lives in a little town in the northwest part of the island called Quebradillas. When we were married, I learned to make all sorts of Puerto Rican dishes, but this one is probably my favorite. It's called Tostones (pronounced toes-tone-as) which literally translates to stones in English. Basically, it's just fried plantain. You can not eat plantain raw like you can a banana. You have to cook it to get rid of the naturally occurring acid the fruit produces. Otherwise, you will burn your little mouth.


This is a plantain. The bottom one that you see there. Yeah, that one. That's the plantain. The top one is a somewhat largish banana. Ideally, when making Tostones, you want your plantain to be green (unripe), because as they ripen they sweeten and Tostones are traditionally a savory, potato chipy, kind of snack/side dish. However, I went to three stores before I even found plantains here in Springfield, MO, so I wasn't going to be picky about the ripeness of my plantain.


You can't really peel a plantain like a banana, especially if it's a green one. You're going to have to use a knife to get the peel off. You just need to make a shallow cut through the skin down the entire length of the plantain, and then wiggle the fruit out of its wrapper.


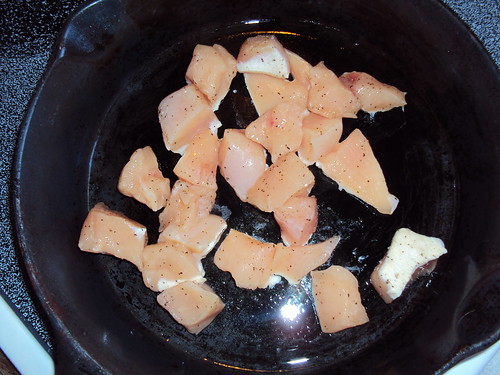
Cut the plantain into 3/4 to 1 inch slices. You want them this thick, because in a minute we are going to smash them flat as a pancake and if you slice them too thin things just won't work out properly. Trust me on this.


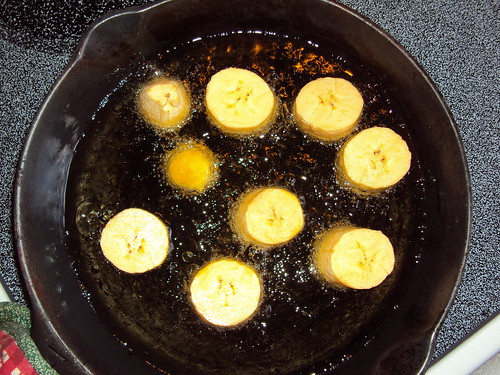
Heat vegetable oil over medium heat and fry your plantain slices until golden.


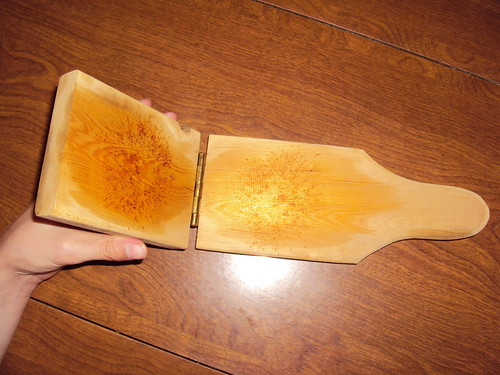
This is a proper plantain smasher. That's what I call it, I'm not sure what the official name for it is, but plantain smasher works for me. I purchased this one in Puerto Rico. Surely, someone, somewhere in the United States sells these, but I'm not sure. If you don't have one, just use the bottom of a glass to smash your plantains.


Move your golden, fried plantain slices to a paper towel lined plate to drain.


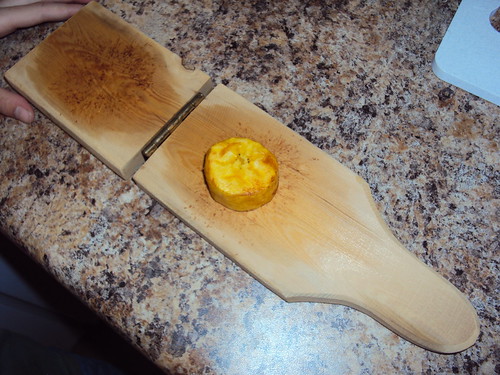
Then you put a single slice into the plantain smasher


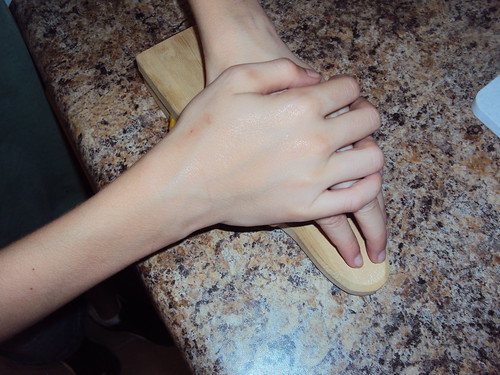
And SMASH! This is my son's favorite part.


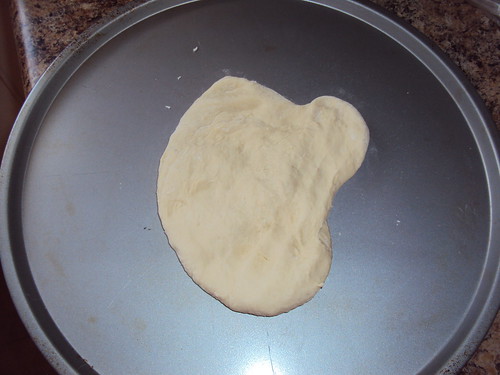
Now you have a flat plantain. It's almost a Tostone, but not quite.


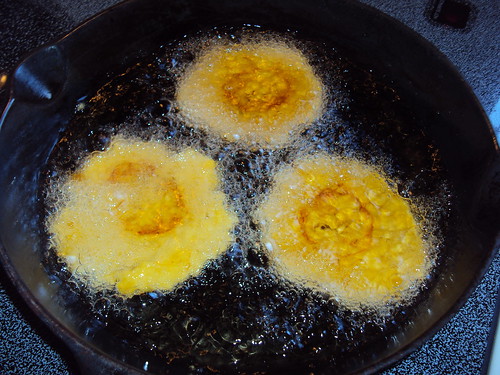
To turn it into a full fledged Tostone, you have to fry it again. Fry it for about three to four minutes until golden brown and slightly crispy on the outside, but still a bit soft on the inside.


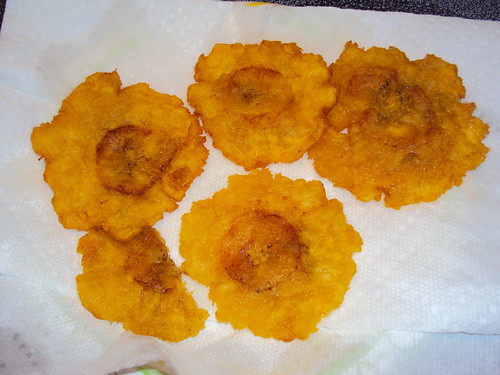
Drain on a paper towel lined plate again and add whatever seasonings your creativity allows. We just went with your basic light salting. Since our plantain was yellow instead of green, our Tostones had a slight sweetness to them. If you go traditional and use a green plantain, your Tostones won't be sweet. They will have more of a potato type flavor. I almost didn't get a picture of the finished product, because the Tostones were being eaten almost as fast as they were being taken out of the hot oil. Notice the half-eaten one on the bottom left.


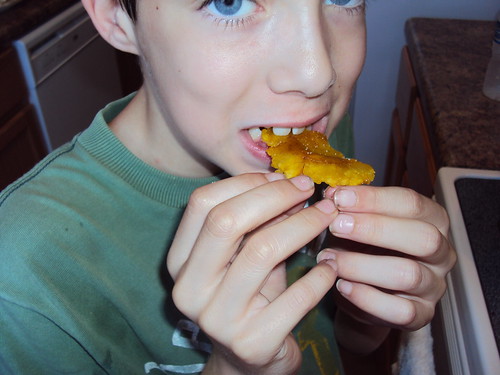
Seriously, Son, you need to at least wait until they've cooled off a bit. Oh, and um, cut your fingernails.